Ring Generator
The Ring Generator lets you design your own ring frames inside Tokenizer 2. You pick a starting design, change it until you like it, and add it to your token. Every ring is drawn on the spot, so you are never limited to a fixed set of pictures. Does it uses AI? No it's all procedurally generated from maths (a set of standard, well-known graphics techniques, implemented directly).
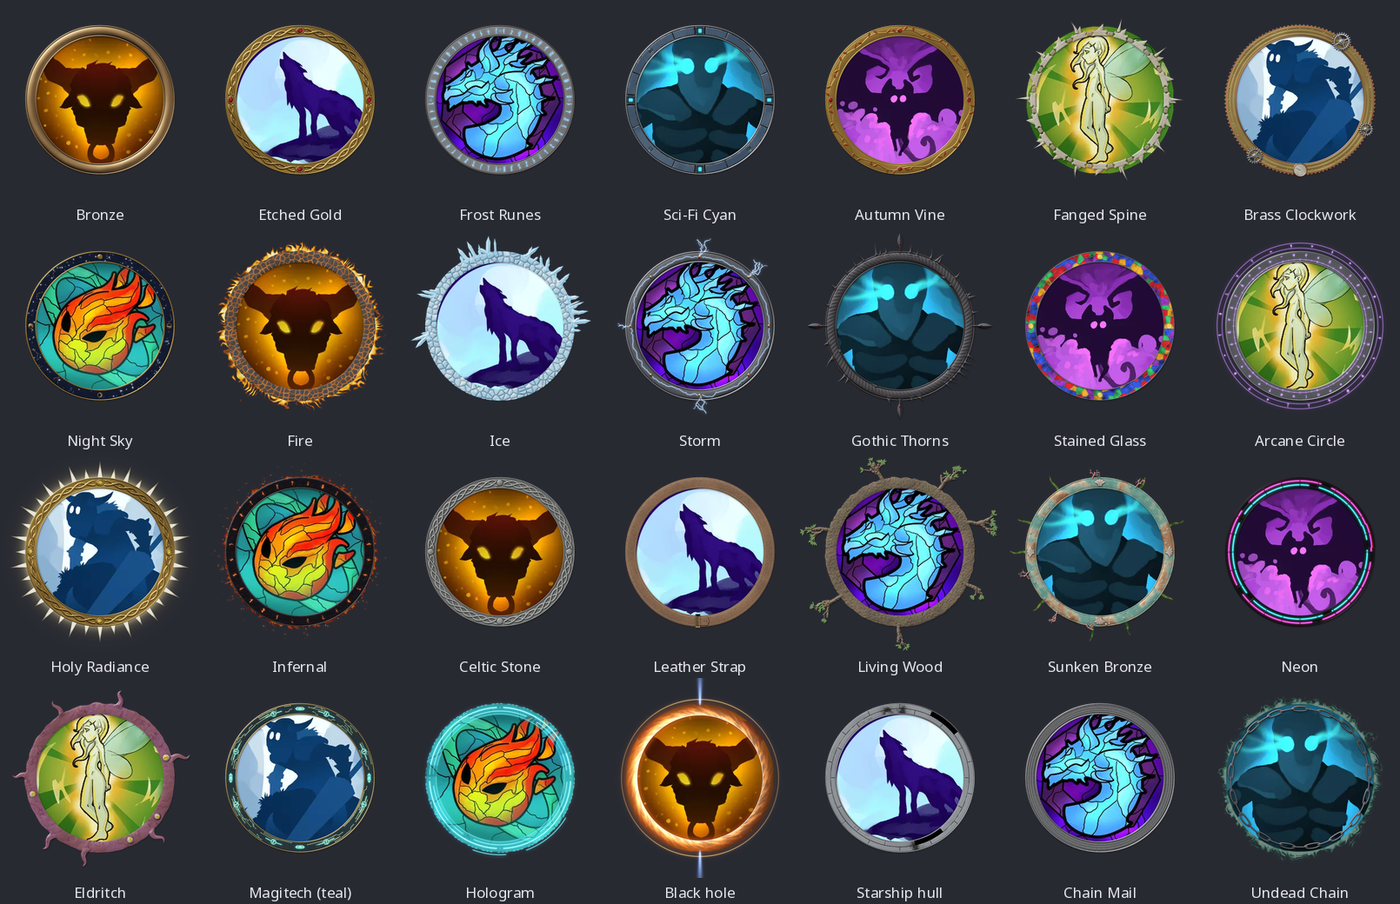

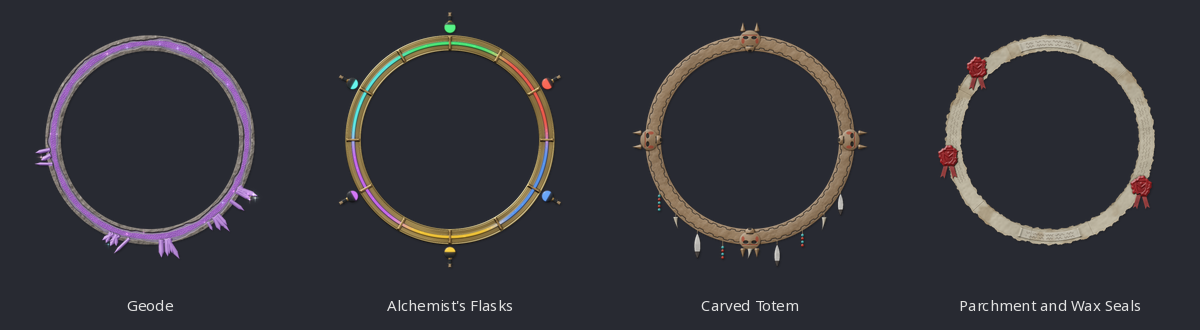
How it works
A ring is made from a few simple parts:
- Shape - the outline of the ring, such as a plain band, a twisted cable, thorns, gears or flames.
- Materials - what each part is made of, such as gold, iron, oak, stone or glowing glass.
- Lights and gems - glowing details and set stones, with colour sets for allies, neutrals, enemies and magic.
- Ornaments - crests that sit on the ring, such as a crown, wings, crossed swords, a scroll banner or a number badge.
- Effects - changes to the ring itself, such as battle damage, frost or a game condition.
A theme is a saved mix of all of these. Tokenizer 2 comes with lots themes, and you can save your own.
Each time you change a setting, the preview redraws in a moment. Nothing is saved until you press Add Frame.
Opening it
- Click an actor's portrait to open the editor.
- In the Rings panel, click Ring Generator under Ring Tools.
You can also click Design a Ring at the top of the Frame Browser.
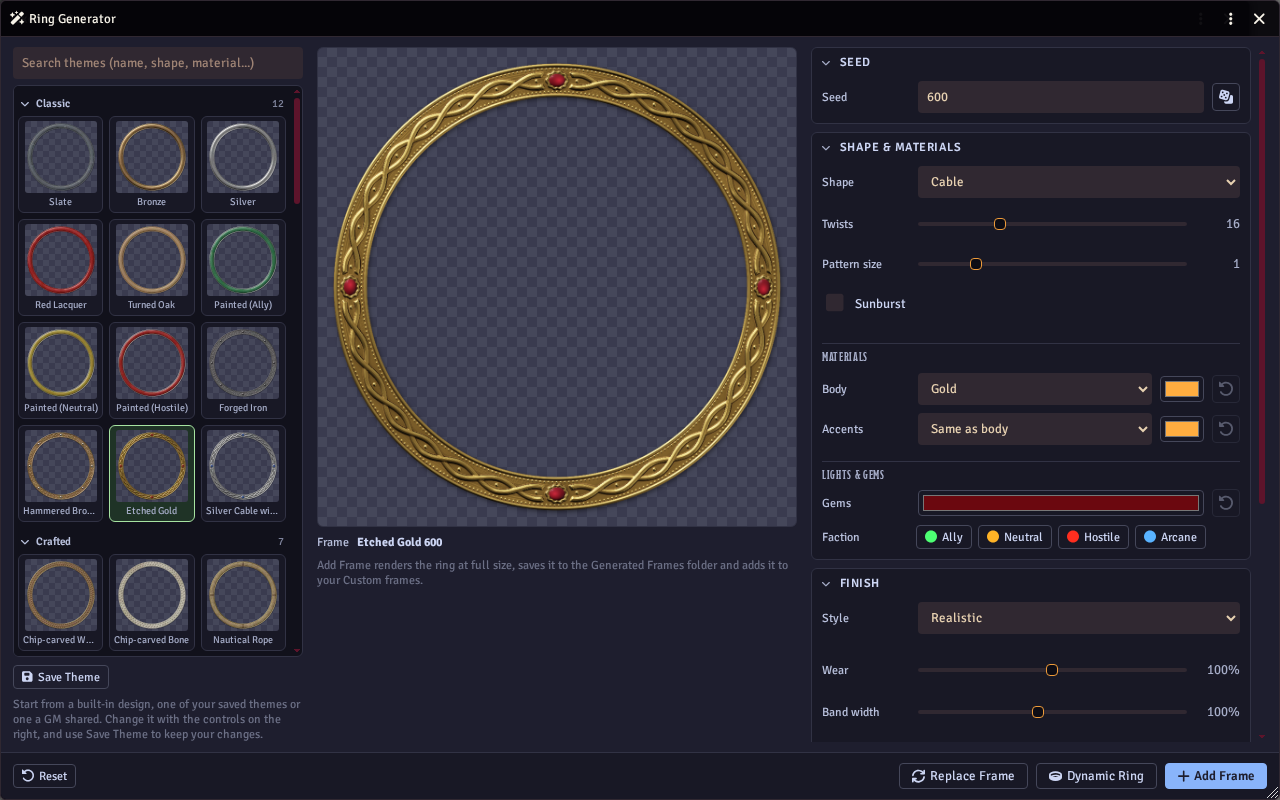
The Ring Generator opens in its own window. The theme gallery is on the left, the preview in the middle, and the controls on the right. The controls sit in sections, in this order: Seed, Shape & Materials, Finish and Ornaments & Effects. Click a section's heading to fold it away or open it again.
Sample frames
The first time you open the Frame Browser, Tokenizer 2 asks whether to generate a sample set of ten ring frames. They take a few seconds to draw, and then appear on the Tokenizer tab. They are saved to the Generated Frames folder, and a set made by a GM is shown to every player. Choose No (Ask me later) to be asked again next session, or No (Don't ask me again) to stop the question. Until the set exists, the Tokenizer tab has a Generate Sample Frames button.
1. Pick a theme
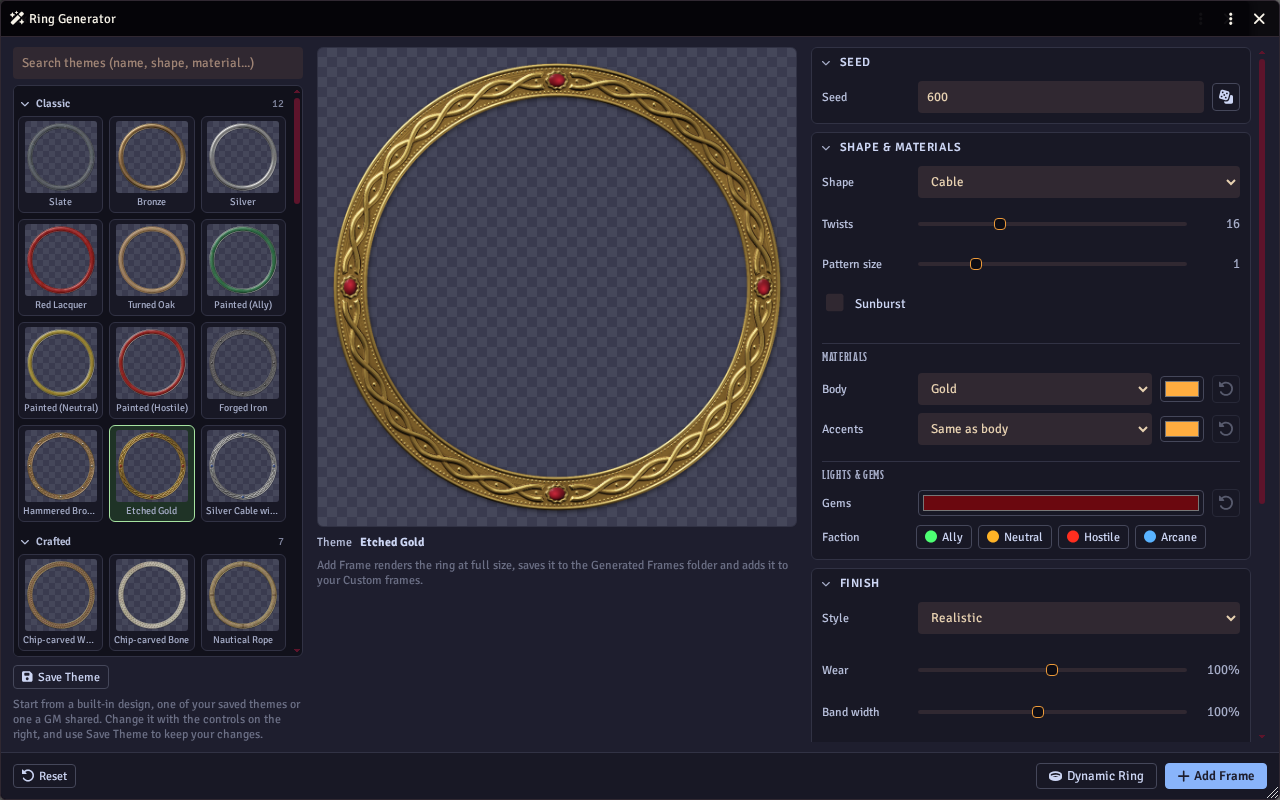
Click a design in the theme gallery on the left. The gallery stays in view while you work, so you can switch themes at any time. Your saved themes come first, then any your GM has shared, then the built-in themes in groups such as Classic, Elemental, Sci-fi and Dragons. Click a group's heading to fold it away.
Type in the search box to narrow the gallery. It matches a theme's name, shape, materials (such as gold or bone), ornaments and style, and every word you type must match.
The thumbnails are drawn in the world's ring style the first time they come into view, then kept in your browser, so the gallery opens straight away next time.
Pick the one closest to what you want. You can change everything about it in the other tabs. Once you have changed a theme, its name is marked (edited), and picking another theme asks before your changes are lost. Built-in themes have no finish of their own, so the thumbnails show them in the world's style. If your finish (style, wear, band width and so on) differs from the theme you pick, the Ring Generator asks whether to keep yours or use the theme's, and lists what differs. Tick Remember my choice to stop it asking until you close the window.
Save Theme keeps your changes as a new theme, so you can use it again later.
2. Seed
Seed It reshuffles everything random in the design, like crack patterns, star positions, flames or the way scales fall. Type a number to get the same result again, or press the dice for a new one.
3. Shape & Materials
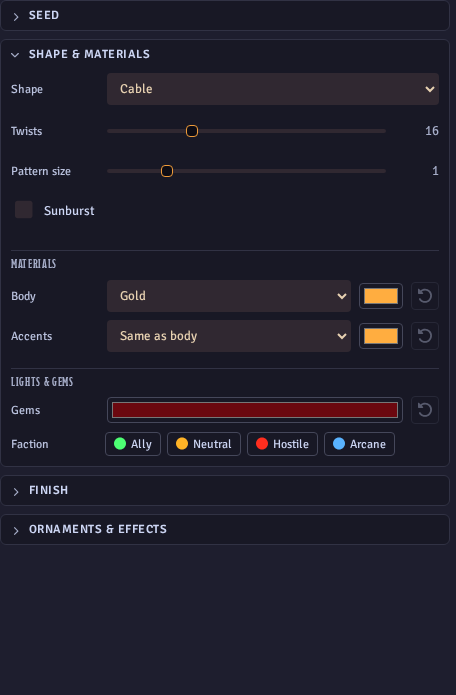
Shape sets the outline of the ring. Each shape has its own settings, such as how many twists a cable has, how tall flames grow, or how many eyes peer out of an eldritch ring. Shapes with a repeating pattern (scales, cells, links, stitches, waves, runes and so on) also have Pattern size, which draws the pattern larger or smaller: above 1 there are fewer, bigger repeats, such as one row of large dragon scales. Designs with randomly placed features, like thorns, stars or coral, have a spacing setting so they do not bunch up.
Sunburst adds rays of light behind the ring.
Materials sets what each part of the ring is made of. Pick a material from the list, and use the colour swatch beside it to tint it. The reset button next to each one puts it back to the theme's choice.
Lights & Gems sets the colour of the gems and glowing parts. The Ally, Neutral, Hostile and Arcane buttons apply a matching colour set in one click.
4. Finish
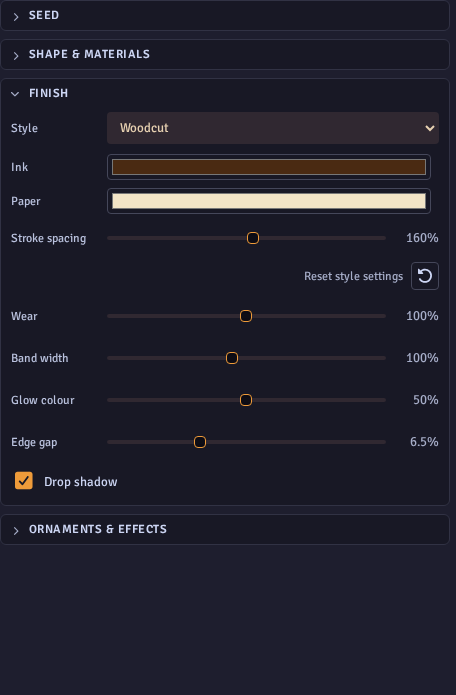
Style draws the ring to match your token art:
- Realistic - shaded metal, stone and wood.
- Cartoon - flat colours with bold outlines.
- Ink drawing - pen strokes and hatching.
- Flat - simple colours with no shading.
- Pixel art - chunky pixels for retro tokens.
- Line art (ShadowDark) - black ink on white, with hatching, to match black and white tokens such as ShadowDark's.
- Woodcut - a carved print, with ink lines following the shape and a few flat tones.
- Comic halftone - flat comic colours shaded with dot screens.
- Watercolour - soft washes with pooled edges and paper grain, with no shadow.
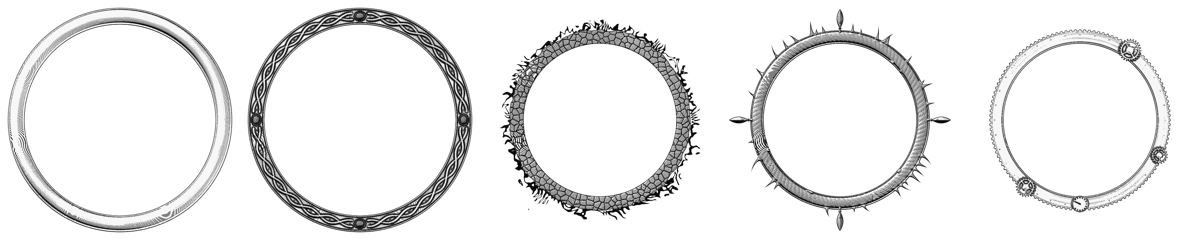

Most styles have settings of their own under the Style menu:
- Ink and Paper colours, for cartoon outlines, ink drawing, pixel art outlines, line art, woodcut, comic halftone dots and watercolour paper.
- Hatch spacing, Stroke spacing or Dot spacing spaces out ink drawing and line art hatching, woodcut strokes or comic halftone dots.
- Pixel size makes pixel art coarser or finer, showing how many art pixels fit across a token.
- Edge bleed sets how far watercolour washes run past the ring's edge, from a clean edge to a wet, ragged one.
Settings you leave alone follow the style, and the reset button under them goes back to the world's settings. They are saved with your themes and frames.

A GM can choose which style the generator starts on, and its settings, in the module settings. To draw your token art in the same style as its ring, use Ring Style in the Layer Effects tool.
The other settings fine-tune the look:
- Wear adds scratches, tarnish and grime.
- Band width makes the ring thicker or thinner.
- Glow colour sets how much colour the glowing parts keep.
- Edge gap sets the space between the ring and the edge of the image, so the ring can run right to the edge.
- Drop shadow adds a soft shadow under the ring.
5. Ornaments & Effects
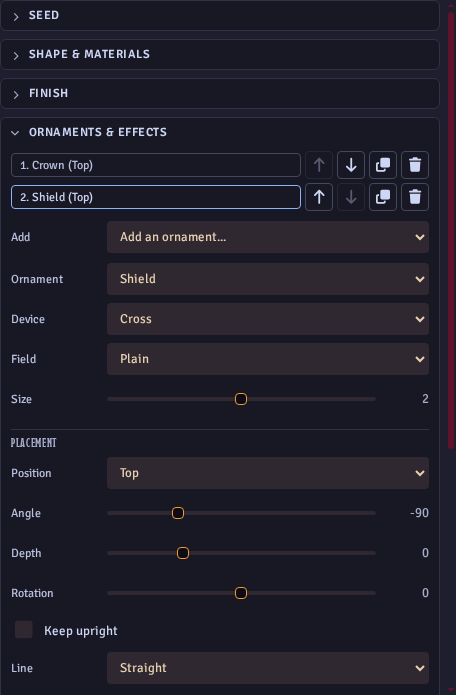
A ring can wear up to eight ornaments. Choose one from the Add list. You can pick by type (crown, skull, laurels, shield, pips, number badge, rank insignia, targeting brackets, or your own picture), by what it means (Boss, Villain, Elite, Ally, Tier 1 to 5, Target), or by army rank (the Ranks (Army) group).
Click an ornament in the list to change it:
- Position places it at the top, bottom, a corner, or any angle you like.
- Depth sets it lower into the ring, or raises it above the ring with a value below zero.
- Rotation, Keep upright and Line (straight, or following the ring's curve) change how it sits.
- Materials gives the ornament its own metal and inlay colour.
Copies repeats an ornament without adding more to the list, and every copy changes when you edit it:
- Flip draws it mirrored, facing the other way.
- Mirror across the ring adds its mirror image on the other side, for pairs such as wings: place one wing at the top left and the other appears at the top right.
- Repeat draws up to twelve copies.
- Spread sets where the copies go: at 360 they are spaced evenly all round the ring, starting from the ornament's position; less spreads them across that many degrees, centred on it.
A ring draws at most 32 ornaments, copies included.
The buttons beside each ornament in the list move it up or down, duplicate it, or remove it. Ornaments lower in the list are drawn over the ones above them. Duplicate an ornament when you want a copy you can change on its own, such as a second wing in another metal.
To use your own picture, choose Your image. It can keep its own colours, or be embossed in a material such as gold.
See Ornaments and Number Badges for every ornament.
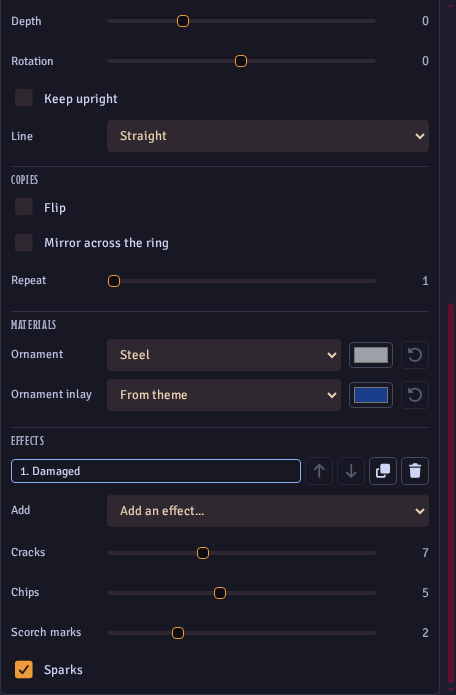
Further down the same section, Effects change the ring itself. Frame effects make the ring look damaged, bloodied, frozen, burning or poisoned, or give it a flickering power failure. Conditions draw a game condition onto the ring, such as frightened, grappled or on fire. A ring can carry up to eight effects. They can be moved, duplicated and removed in the same way as ornaments, and are applied in list order.
See Conditions on Tokens for every condition.
Look closer
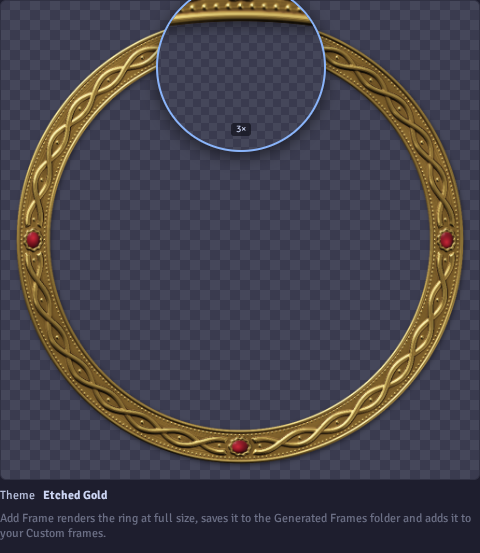
Hover over the preview to see that part of the ring up close. Scroll while hovering to zoom further in or out. The view sharpens once a detailed copy of the ring has finished drawing.
Add it to your token
When you are happy, press Add Frame. Tokenizer 2 draws the ring at full size in the background, saves it as an image in your Generated Frames folder, and adds it to your token as a frame layer. The window closes once the frame is on your token.
When the Ring Generator was opened without a token (from the Dynamic Rings window, say), the button reads Save Frame instead and keeps the frame in your Custom frames, ready to add from the Frame Browser.
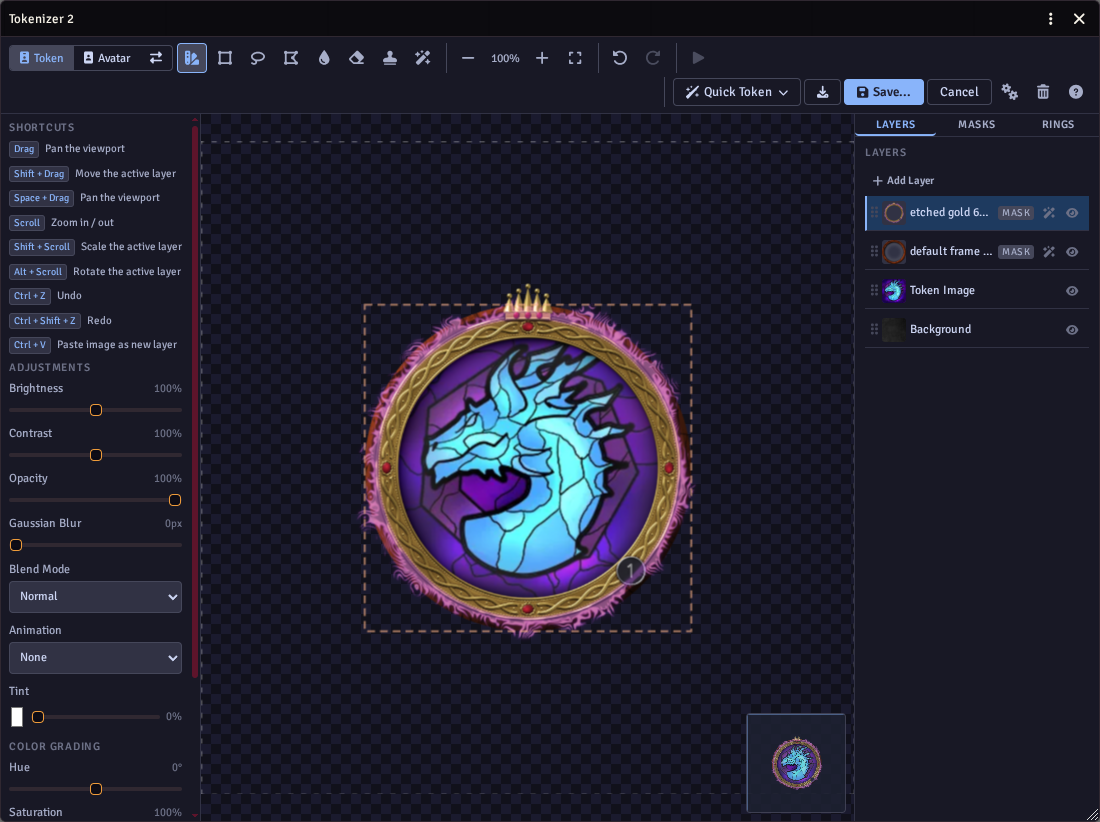
The new frame also appears in the Custom tab of the Frame Browser, so you can use it on other tokens without making it again.
Change a frame you made
Every frame you add remembers how it was made. In the Frame Browser, hover over one of your generated frames and click the pencil in its bottom-left corner (Edit in Ring Generator). The Ring Generator opens with that frame's design and finish, ready to change. The name under the preview shows the frame's name in place of the theme's. Reset goes back to the frame as you made it.
When you are done, you have two choices:
- Add Frame keeps the old frame and adds the changed one next to it.
- Replace Frame puts the changed one in the old frame's place, in your Custom frames, Favorites and Recent.
Either way the old image file is kept, so tokens already using it do not change. Replace Frame only shows for frames in your own Custom frames; a GM can also replace frames they shared. The sample frames on the Tokenizer tab can be opened too, but only added as new frames.
To change a frame already on your token, right-click its layer and choose Edit in Ring Generator. The frame you add or replace takes that layer's place, at the same size, and any masks cut to the old frame's shape follow the new one.
After you add or replace a frame, the Ring Generator keeps it open as the frame you are working on, so you can carry on changing it next time. If you close the window without adding or replacing, the design stays but the frame is let go. Picking a theme in the gallery starts a new design.
Frames shared by a GM keep their design too, so players can open them and make their own versions. Frames made before this feature, or added with Browse Files, cannot be reopened.
Make it a dynamic ring
A GM can also turn the ring into one of Foundry's own dynamic token rings with Dynamic Ring, next to Add Frame. The window then switches to editing that ring: the preview shows it as Foundry draws it, around your character, and an In Foundry section appears for its name, colouring, background and place in Foundry's list. Carry on changing the design, and press Update Dynamic Ring to save. A Dynamic Rings button appears next to it, which opens the Dynamic Rings window on this ring. A player's button reads Export Dynamic Ring and downloads the design for a GM to import. See Dynamic Rings.
Rings that reach past the token
Some designs reach past the ring itself: flames, ice shards, thorns, gears, lightning, dragon horns, mushrooms, pennants, crystals, flasks, pendants, seal ribbons and some ornaments. These rings are drawn on a larger canvas and shown 1.25 times the size of other frames, so the ring still lines up.
The preview shows the token's edge as a dashed line. On a normal token, anything past that line is cut off. Turn on Oversized in the editor to let it spill out onto the map.
Sharing themes
Your saved themes are kept for you in your browser. A GM can Share a theme with everyone in the world, and shared themes appear in everyone's theme gallery.
What techniques though?
- Signed distance functions for shapes (rounded boxes, triangles, ellipses, segments), including formulas widely popularised by Inigo Quilez's articles.
- Value noise with fractal Brownian motion for textures, wear and grime masks.
- Height-field shading: normals from gradients, a Blinn-Phong-style specular term, and a simple studio environment approximation for metal reflections.
- Exponential tonemapping, plus an exact inverse for the stylised modes.
- Jittered-grid Voronoi for hammered metal, lava, ice and stained glass.
- Midpoint displacement for lightning and cracks, and recursive branching for roots, coral and branches.
- Euclidean distance transforms for rounded relief on drawn shapes.
- Conventional non-photoreal methods: quantised cel lighting, edge-detected outlines, hatching, and pixel-art downsampling.
- Print and paint looks: noise-warped woodcut lines, rotated halftone dot screens, and watercolour washes with displaced edges and pigment pooling.