Getting Started
This page walks you through making your first token, from opening the editor to saving.
Open the editor
Open an actor's sheet and click its portrait. The Tokenizer 2 editor opens instead of the usual file picker.
You can also choose Tokenizer 2 from the sheet's header menu. To open the normal file picker instead, hold Shift while you click the portrait. A GM can swap these round in the settings, so a plain click opens the file picker and Shift+click opens Tokenizer 2.
What you see first
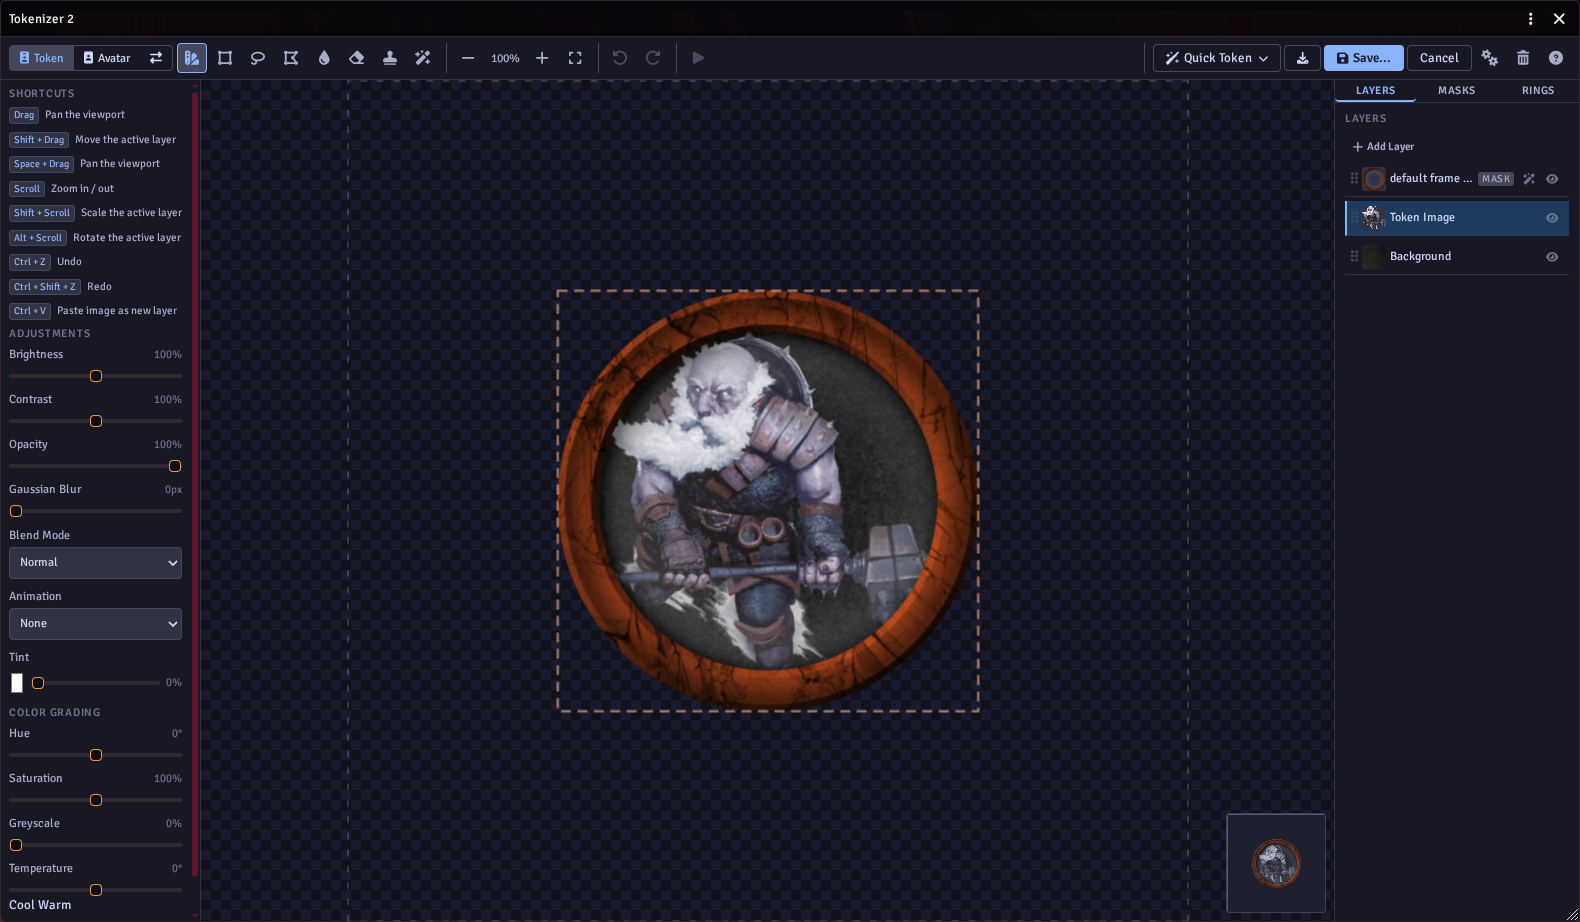
The first time you open an actor, Tokenizer 2 builds a starting token for you:
- the actor's portrait, clipped to fit inside the ring,
- a ring that matches the token's disposition (friendly, neutral or hostile),
- and a background behind the portrait.
The dashed square shows the edge of the token. When the token is oversized, a second, larger dashed square shows how far it can spill out.
The editor has four parts:
- The toolbar across the top - the editing tools, zoom, undo and redo, and saving.
- The left panel - settings for the selected layer and the tool you are using.
- The canvas in the middle - your token, with a minimap in the corner to find your way when zoomed in.
- The right panel - the Layers, Masks and Rings tabs.
Click ? at the top right at any time for a guided tour.
Move and size the portrait
Click a layer in the Layers tab to select it. Then on the canvas:
- Shift + drag moves it.
- Shift + scroll makes it bigger or smaller.
- Alt + scroll rotates it.
Plain drag and scroll move and zoom your view, not the layer. For handles you can drag, use the Transform tool. See Tools.
Choose a frame or ring
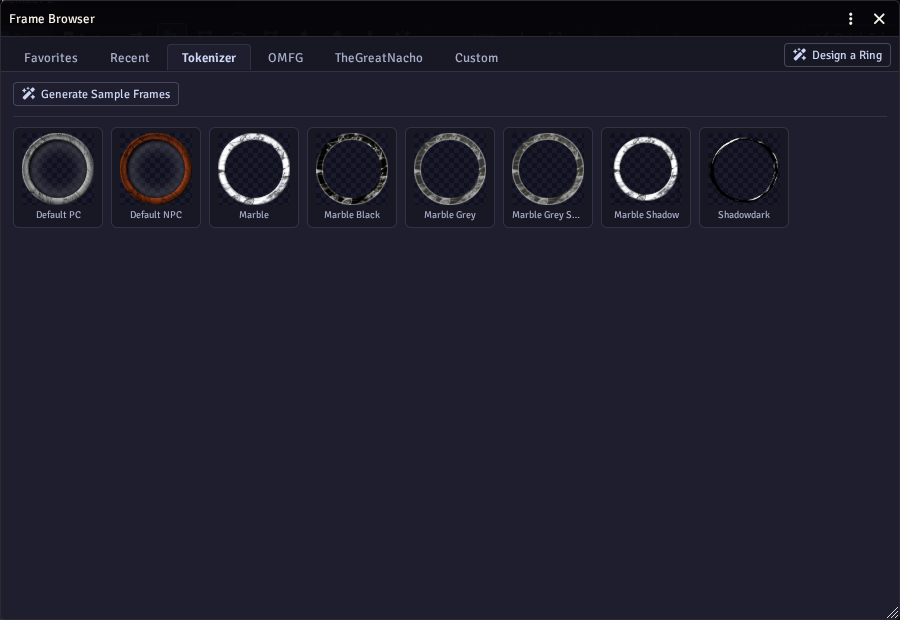
Open the Rings tab and click Browse Frames/Rings. Pick a frame from the built-in sets, your own custom frames, or design a new one in the Ring Generator.
A frame clips the layers below it to its inner window, so the portrait sits neatly inside.
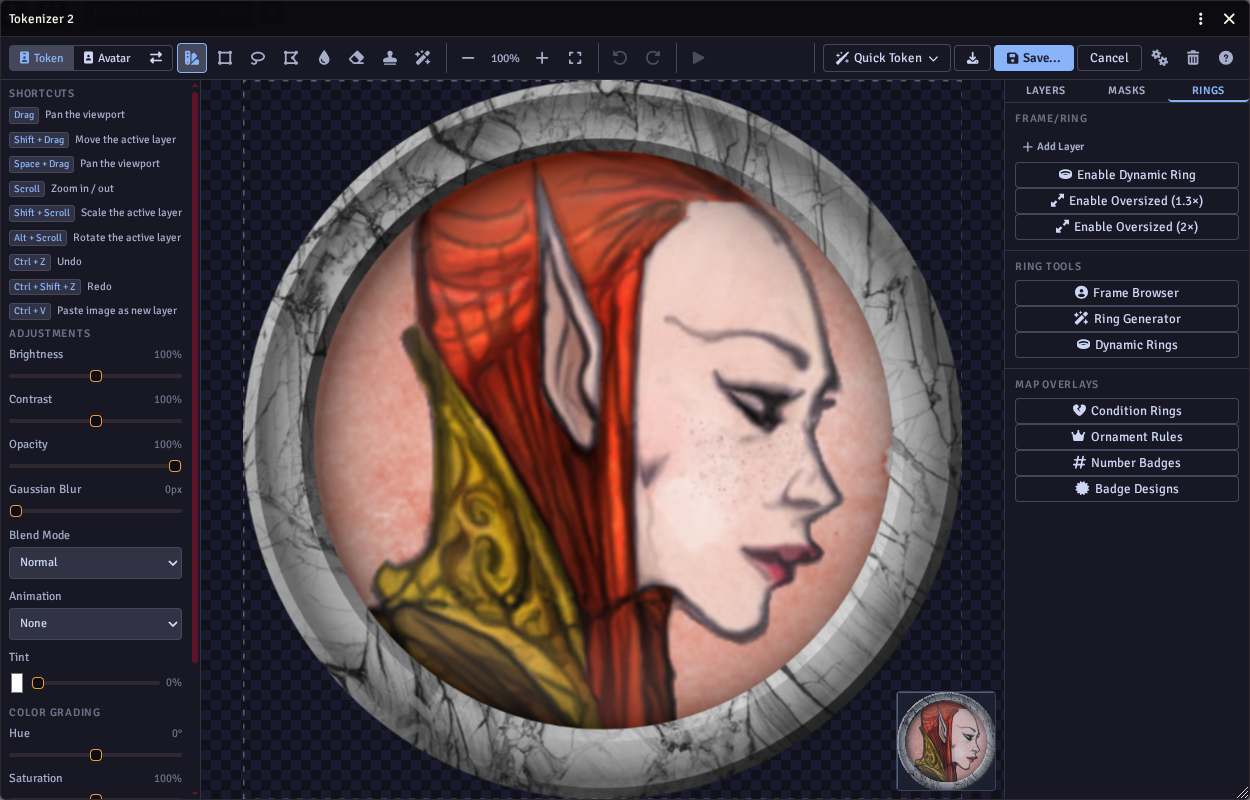
The Rings tab also has:
- Add Shape Ring - a simple circle, square or hex border you can colour and texture.
- Enable Dynamic Ring - use Foundry's dynamic token ring instead of a frame in the image. Foundry draws the ring on the token, with its own colours and effects.
- Enable Oversized (2x) - make the token twice the size, so parts can spill outside the ring.
- Enable Oversized (1.3x) - make the token a little larger, so parts can spill a little way past the ring.
- Enable Ring Fill (1.3x) - with the Dynamic Ring on, make the whole token 1.3 times larger so the ring fills the square.
- Ring Tools - open the Frame Browser or the Ring Generator to add a frame layer, and for a GM the Dynamic Rings window.
- Token Overlays (GM) - the condition rings, ornament rules, number badges and badge designs drawn on tokens on the map. A GM also gets the Condition Rings and Badge Designs editors, and the Ornament Rules and Number Badges settings.
Add more layers
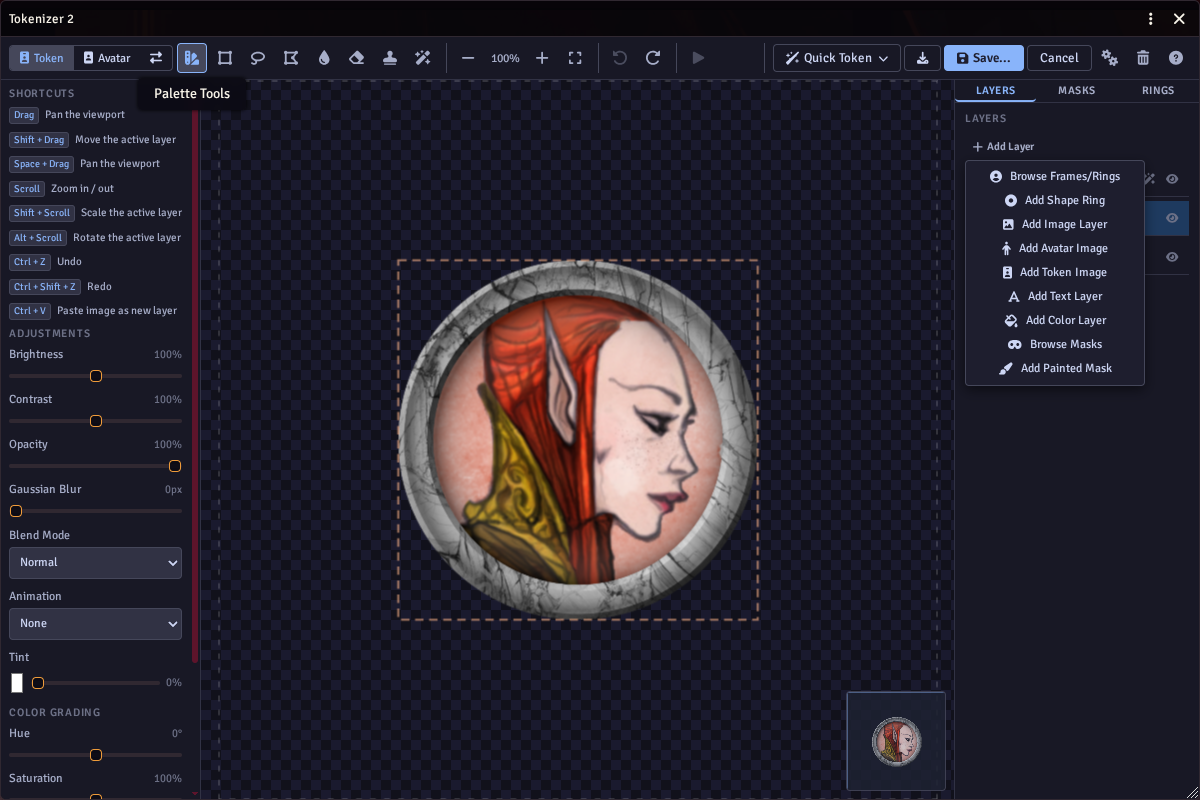
Click + Add Layer at the top of the Layers tab to add:
- frames and rings, or shape rings,
- an image from your files, or the actor's portrait or current token image,
- text, or a solid colour,
- a mask image, or a painted mask you draw yourself.
You can also paste an image with Ctrl+V, or drop in a video.
Layers are drawn from the bottom up, so the layer at the top of the list is in front. Drag layers to change their order. Right-click a layer to duplicate, flip, lock or delete it.
See Layers, Frames and Masks for every layer type and option.
Masks
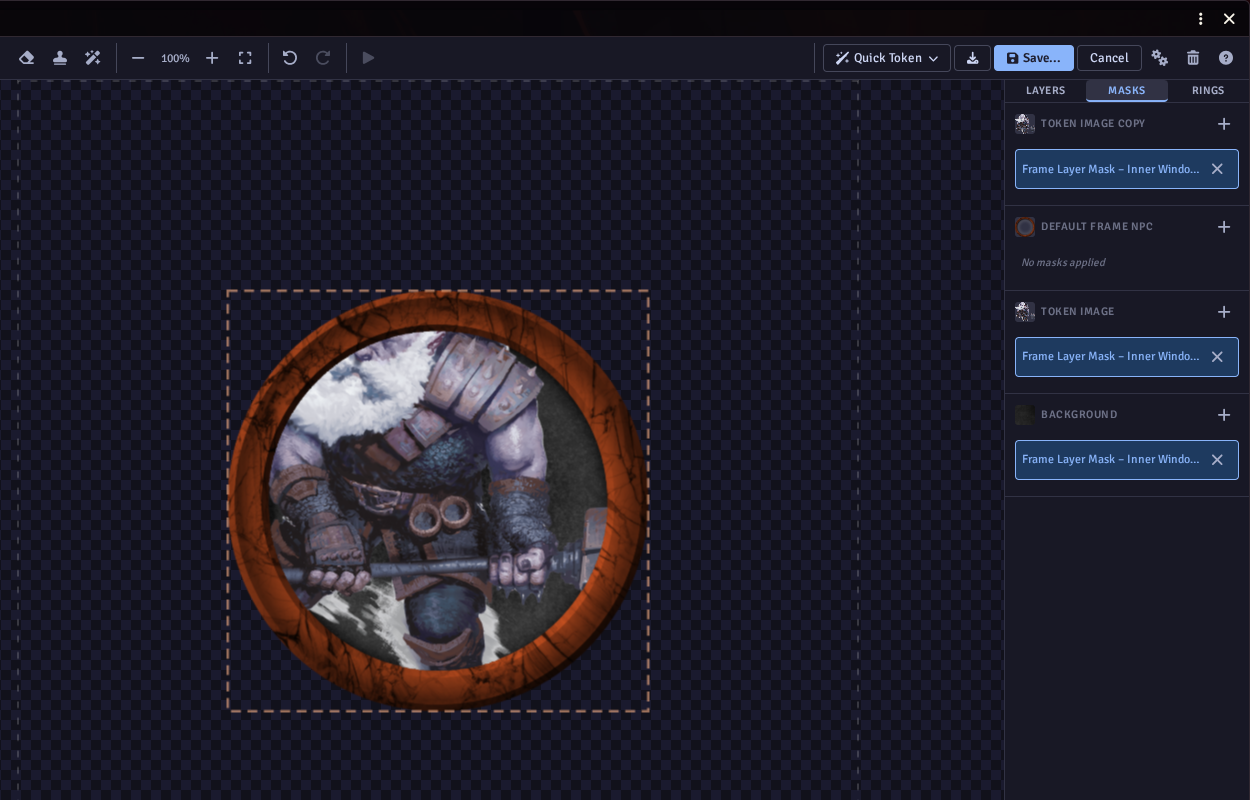
A mask decides which parts of a layer show. The Masks tab lists every layer and its masks, so you can add, change or remove them in one place.
Tokenizer 2 sets up the masks you need to begin with, so you only come here to change something, for example to let a character pop out of their frame.
Token and Avatar
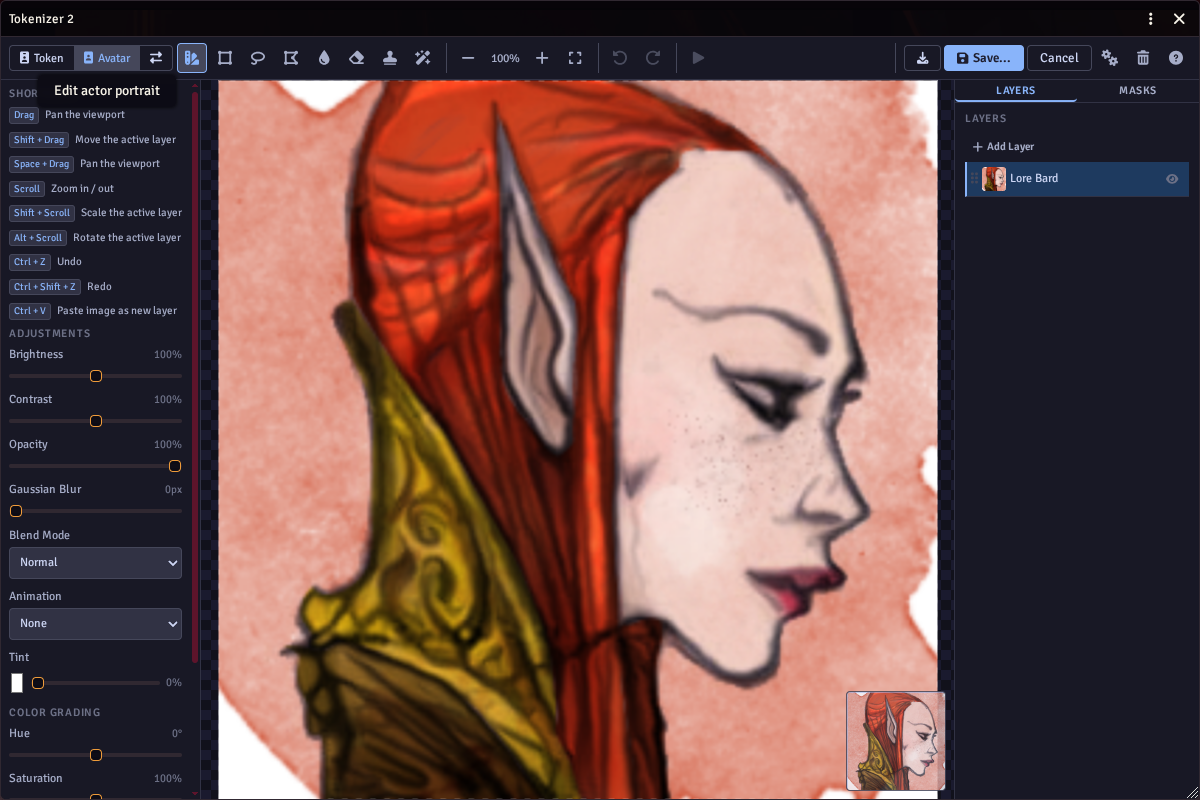
The Token and Avatar buttons at the top left switch between editing the token and editing the actor's portrait. Each keeps its own layers.
Avatars can be square, portrait shaped, or any size you like. The arrows button next to them copies what you see into the other mode.
Quick Token
The Quick Token menu rebuilds the token in one click:
- Build from Actor Image - start again from the actor's portrait.
- Build from Token Image - start again from the current token image.
- ShadowDark / Line Art - a black and white line drawing look.
Save
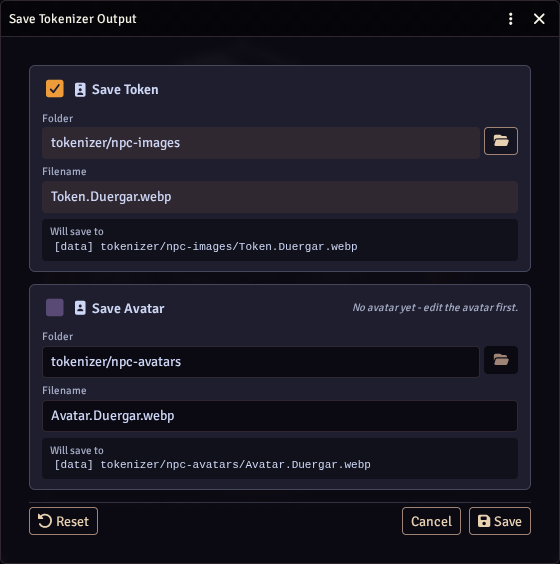
Click Save... when you are happy. The Save dialog shows where each image will go. You can change the folder and file name for this save only, and choose whether to save the token, the avatar, or both.
Tokenizer 2 saves the image (WebP by default), sets it as the actor's token or portrait, and remembers your layers. Next time you open the editor, every layer is still there, ready to change.
The other buttons next to Save...:
- Download saves the image to your computer.
- Cancel closes without saving.
- The cogs open the settings.
- The bin clears Tokenizer 2's saved layers for this actor and resets the token to its portrait.
If the actor uses wildcard token images, saving adds a new numbered image without changing the wildcard path.
Saving from the actor sheet or sidebar updates the actor's prototype token only; tokens already placed on a scene are left as they are. To change a placed token, open the editor from the token itself: double-click it on the canvas and click the portrait in its sheet. The Save dialog then asks whether to update that token, the actor's prototype token, or both. A linked token, such as a player character, updates both by default; an unlinked token updates only itself, unless you choose to make its image the actor's default too. A linked token counts as opened from the canvas while it is the only one of that actor selected. If you update only one of them but save over the file the other one shows, the dialog warns you: the other one changes too once the browser loads the file again, after a page reload or when its cached copy expires. Give the file a new name to keep them apart. A design saved to a linked token alone stays with that token: opening the editor from it again brings that design back, while the actor sheet and sidebar keep the actor's. To refresh tokens placed before a change, or after editing the prototype token by hand, a GM can right-click the actor in the Actors sidebar and choose Tokenizer 2: Apply Token Image to Scene Tokens. This copies the prototype token's image, scale and dynamic ring to every token of that actor on the viewed scene; with a wildcard token image, each token gets its own pick.
Undo
Ctrl+Z undoes and Ctrl+Shift+Z redoes, across every tool. The editor remembers your last 20 changes. Token and Avatar mode each keep their own history.
Keyboard shortcuts
| Shortcut | Action |
|---|---|
| Drag / Space + Drag | Pan the view |
| Shift + Drag | Move the active layer |
| Scroll | Zoom in / out |
| Shift + Scroll | Scale the active layer, or resize the brush |
| Alt + Scroll | Rotate the active layer |
| Ctrl + Z / Ctrl + Shift + Z | Undo / Redo |
| Ctrl + V | Paste an image as a new layer |
| Del / Backspace | Cut the Magic Lasso selection |
| Escape | Discard a selection, or cancel a Freehand or Clone/Heal session |
Pathfinder 2e
PF2e scales small actors' tokens to 0.8x, so they can look slightly smaller on the map than in the editor. Oversized tokens turn PF2e's autoscale off so their 1.3x or 2x scale sticks. To change either, use the lock button next to the Scale slider in the token config Appearance tab.